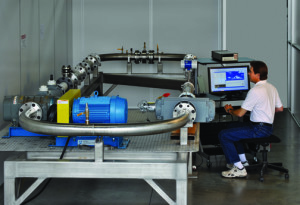


 Fox Thermal Instruments’ calibration tunnels are calibrated at appropriate intervals, monitored for stability, and under the custody of trained laboratory personnel. Measurement assurance procedures and monitoring results are maintained in the laboratory database to ensure that all calibrations are accurate, verifiable, and traceable to NIST primary standards.
Additionally, the calibration laboratory, along with the other facets of manufacturing Fox flow meters, are controlled by a set of standards and procedures as part of an extensive business and quality management system. The business and quality management system at Fox Thermal Instruments is ISO 9001:2008 certified and Fox is committed to continual improvement of its products, services, and procedures. Over the years, as the Fox product line has increased and innovative features have been introduced, like the Gas-SelectX gas selection menu available on the Model FT1, the Calibration lab has seen many improvements, innovations, and additions. Click to see more information about Fox Certifications.
Meeting customer needs for exceptional process conditions with traits such as high temperature gas flows, complex gas compositions, and high volume orders has been one of the over-arching goals of the Fox Calibration Lab team.
Fox Calibration Lab equipment includes:
Calibration capabilities range from as low as 0.02 SCFM (.03 NM3/H) to 3000 SCFM (4800 NM3/H) and higher for line sizes larger than 6 inches (150mm). The Calibration Lab is also equipped to calibrate applications with temperature ranges from -40 to 650F (-40 to 343C) and pressure ranges from 0 to 500 psig (0 to 35 barg).